macでASP.NET
前回はmacでコンソールアプリケーションの動か方でしたが今回はASP.NETの実行の仕方について紹介します.
yeomanで雛形の作成
ASP.NETの雛形をyeomanで作成します.
yo aspnet
ASP.NETなのでWeb Applicationを選択します.
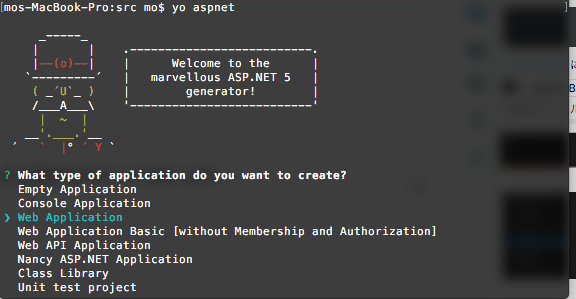
次にアプリケーション名を聞かれます.
今回はWebAppとします.

実行まで
実行までは
cd WebApp
dnu restore
dnx web
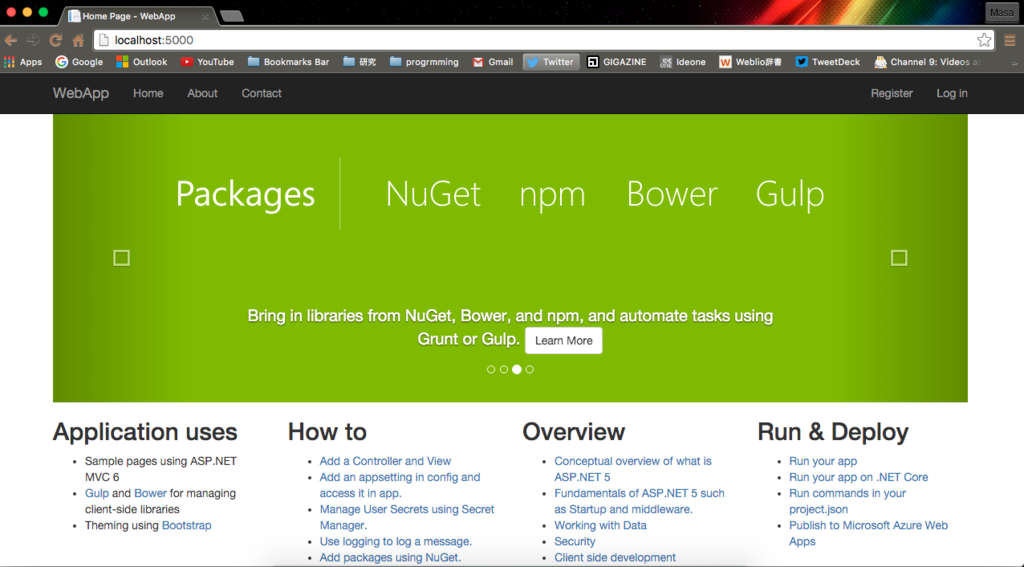
を実行し,ローカルホスト(http://localhost:5000)にアクセスすると動きます.
visual studio codeでc#コンソールアプリケーションの動かし方
今回はc#をmacで動かしたいと思います。 c#を動かすと聞けばvisual studio(VS)を思いつくと思いますがmacなんでVSさんは動きません! そこでVSさんの代わりにMSが提供しているVS codeでやってみたいと思います。
下準備
macにはc#のコンパイラなどは始めからは入っていません。そこで.NETの互換のmonoをbrewでインストールします。
brew install mono
コンソールアプリケーションの雛形をつくるyeomanをインストール
npm install yo bower grunt-cli -g
DNVMのインストール*1
curl -sSL https://raw.githubusercontent.com/aspnet/Home/dev/dnvminstall.sh | DNX_BRANCH=dev sh && source ~/.dnx/dnvm/dnvm.sh

dnvm upgrade -r coreclr
dnvm upgrade -r mono
ターミナルで雛形作成
下準備でインストールしたyeomanでコンソールアプリケーションの雛形を作っていきます。
yo aspnet
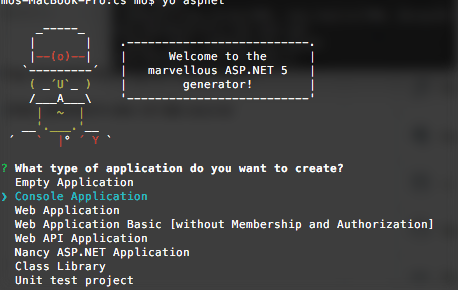
するとさまざまな選択肢がでてきますが2番目のConsole Application を選択します。
選択するとアプリケーションの名前を聞かれます。
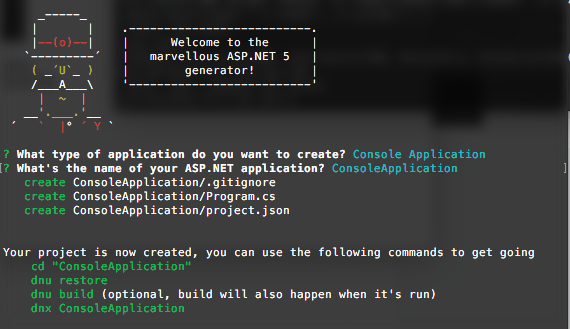
今回はデフォルトの名前でいきます。 ここで次のコマンドを実行しろと言われたので実行しときます。
cd "ConsoleApplication"
dnu restore
dnu build
dnx ConsoleApplication
やっとvs codeの出番です。
vs codeでの設定
先ほど作成したコンソールアプリケーションの雛形をファイルごと開きます。 雛形では
using System;
using System.Collections.Generic;
using System.Linq;
using System.Threading.Tasks;

namespace ConsoleApplication
{
    public class Program
    {
        public static void Main(string[] args)
        {
            Console.WriteLine("Hello World");
            Console.Read();
        }
    }
}
このようなコードになっています。
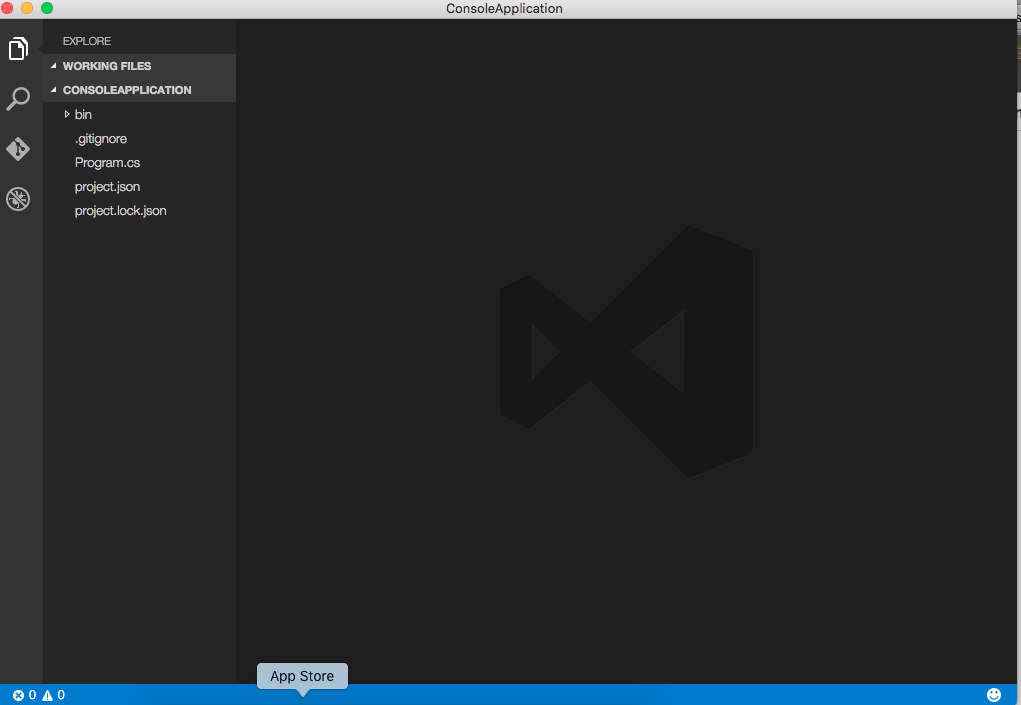
デバッグを選択肢しスタートをクリックします。
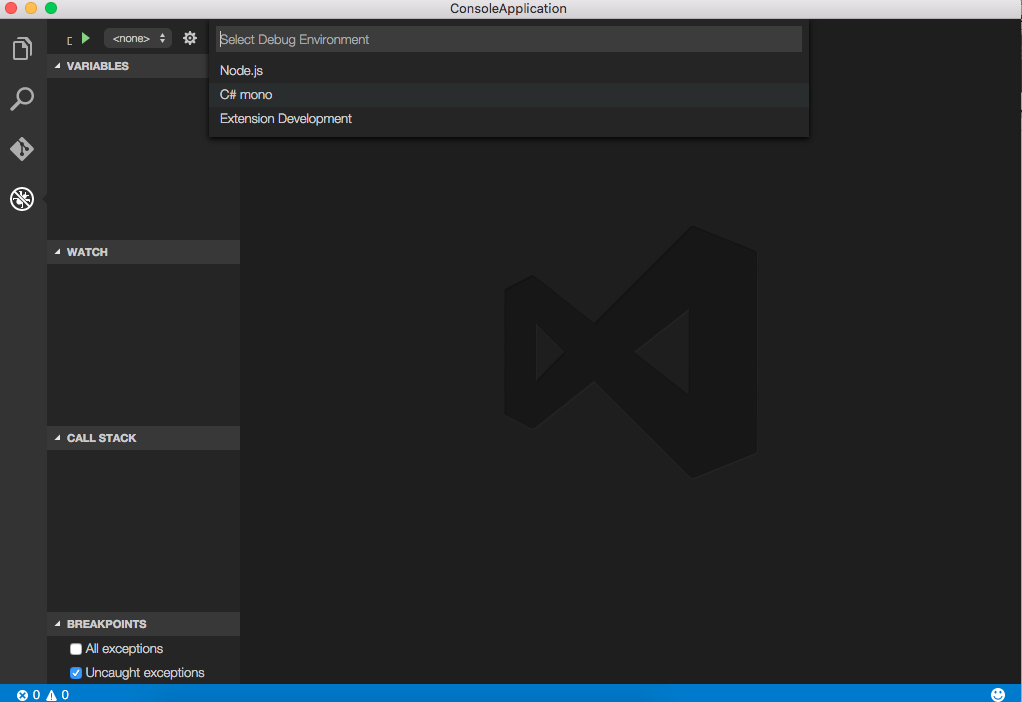
c#ですのでmonoを選択すとlaunch.jsonが生成されます。
次に「comm+shift+B」を押します。

configure taske runnerを選択するとtasks.jsonが生成されます。 現在のtasks.jsonはtypescript用なので書き換える必要があり、次のように変えます。
{
    "version": "0.1.0",

    // The command is tsc. Assumes that tsc has been installed using npm install -g typescript
    "command": "xbuild",


    // Show the output window only if unrecognized errors occur.
    "showOutput": "silent",
    "taskSelector": "/t:",
    // args is the HelloWorld program to compile.
    "args": ["/property:GenerateFullPaths=true"],

    // use the standard tsc problem matcher to find compile problems
    // in the output.
    "tasks": [
        {
            "taskName": "build",
            // Show the output window only if unrecognized errors occur.
            "showOutput": "silent",
            // Use the standard MS compiler pattern to detect errors, warnings
            // and infos in the output.
            "problemMatcher": "$msCompile"
        }
    ]
}
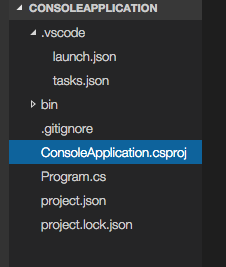
また、プロジェクトファイルが必要のため作成します。 ConsleApplication.csprojの中身は
<Project DefaultTargets = "Build"
    xmlns="http://schemas.microsoft.com/developer/msbuild/2003">

    <!-- Specify the inputs by type and file name -->
    <ItemGroup>
        <CSFile Include = "Program.cs"/>
    </ItemGroup>

    <Target Name = "Build">
        <!-- Run the Visual C# compilation using input files of type CSFile -->
        <CSC  Sources = "@(CSFile)"
            DebugType="full"
            Optimize="no"
            OutputAssembly="Program.exe" >

            <!-- Set the OutputAssembly attribute of the CSC task to the name of the executable file that is created -->
            <Output TaskParameter="OutputAssembly"
                ItemName = "EXEFile" />
        </CSC>
    </Target>
</Project>
となります。
コンパイル
やっときたコンパイル
tasks.jsonを作った時と同じく[comm+shift+B]を押すと

exeファイルができました!!
デバックの画面でスタートのボタンを押すと

出力されてますね。
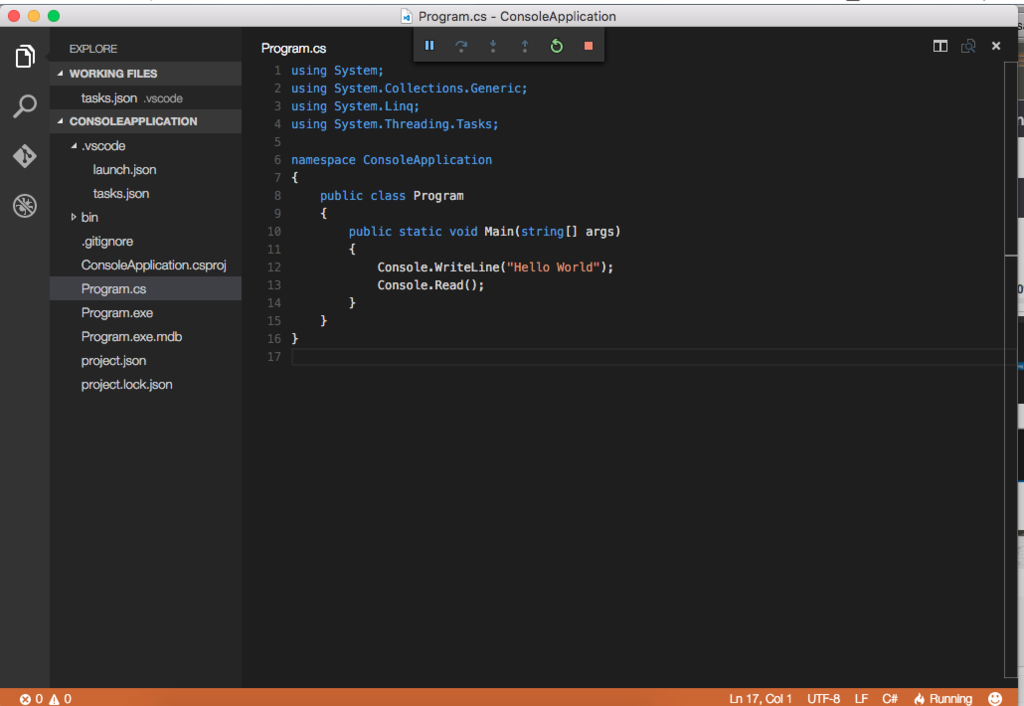
きちんと動いてます。
twitterからデータを取ってくる[python]
pythonを使ってtwitterからデータを取ってくる方法について書きたいと思います.
twitter開発者に登録
まずtwitter developerに登録する登録する必要が有ります.また,twitterのアカウントに電話番号を紐付けてないと登録することができないので注意が必要です.
登録するときはhttps://dev.twitter.com/にアクセスし下の方のTOOLSのManage Your Appsから登録します.
また、keys and access tokesでaccess tokenを発行する必要があります。tweepyのインストール tweepyさん優秀です。pipから簡単にインストールできます。
pip install tweepyコード 読み込んだデータをファイル出力してますが標準出力することも可能です
#! /usr/bin/env python
# -*- coding: utf-8 -*-


import tweepy
import json
import codecs
from datetime import datetime

"""
tweepyの詳細は
http://www.tweepy.org/
コードはgithubを参照
https://github.com/tweepy/tweepy/blob/v3.2.0/docs/index.rst
"""


#jsonのdatetimeエラー対策
def support_datetime_default(o):
    if isinstance(o, datetime):
        return o.isoformat()
    raise TypeError(repr(o) + " is not JSON serializable")


#キーワードに対してtweetを読み込む
def connect_tw():
    #CK,CS,AT,ASはtwitterの開発者コード
    CK = '' #Consumer Key
    CS = '' #Consumer Secret
    AT = '' #Access Token
    AS = '' #Accesss Token Secert

    #twitterにアクセスする処理
    auth = tweepy.OAuthHandler(CK, CS)
    auth.set_access_token(AT, AS)

    api = tweepy.API(auth)

    #keywordは任意
    keywords = u' テスト'
    #リストを用意する
    list = []
    #ツイートを取得しjson形式で書き込む
    for tweet in tweepy.Cursor(api.search, q=keywords).items(100):
        person = {
                u"user_id": tweet.user.id,
                u"screen_name": tweet.user.screen_name,
                u"description": tweet.user.description,
                u"created_at": tweet.created_at,
                u"text": tweet.text
        }
        list.append(person)
    return list

#json形式でファイルを作成する
def output_data(docs):

    d = datetime.now()
    filePath = datetime.strftime(d, "getTweet%Y-%m-%d-%H%M.json")
    f = codecs.open(filePath, 'w', 'utf-8')
    #収集されたデータをJSONファイルに格納する
    json.dump(docs, f, default=support_datetime_default, indent=4, ensure_ascii=False)
    f.close()


def main():
    print 'get tweet'
    text = connect_tw()
    output_data(text)


if __name__ == "__main__":
    main()
- 最後に tweepyさん優秀だけどstreamingAPI系が動かないので注意が必要です! streamingAPIについては後日書きたいと思います。
mongoDBのインストール
はじめに
mongoDBを入れることに何度も失敗してubuntu15.04では動かずubuntu14.04を入れ直したら動く様になりました!!! ほとんどmongoDBのリファレンス通りです. https://docs.mongodb.org/manual/tutorial/install-mongodb-on-ubuntu/手順
apt-getに入ってるmongoDBは古いためリポジトリのリロードが必要になります.
sudo apt-key adv --keyserver hkp://keyserver.ubuntu.com:80 --recv 7F0CEB10
これではプロキシ環境下では公開鍵の認証が取れなかったです.そこで変数を渡す設定にします.
sudo apt-key adv --keyserver hkp://keyserver.ubuntu.com:80 --keyserver-option http-proxy=http://<プロキシ名>:<ポート番号> --recv 7F0CEB10
リロードするURLをetc/apt/spurces.list.dに作成
echo "deb http://repo.mongodb.org/apt/ubuntu trusty/mongodb-org/3.0 multiverse" | sudo tee /etc/apt/sources.list.d/mongodb-org-3.0.list
アップデートしときましょう
sudo apt-get update
インストール
sudo apt-get isntall mongodb-org
- おわり
これで動くはず...
たぶん
動かない時は公式を見てください
研究室のPC設定
研究室で使ってるUbnutuの設定やらのメモです. プロキシの設定は
mo3789530.hatenablog.com を見てください
sudo add-apt-repository ppa:webupd8team/sublime-text-3
sudo apt-get update
sudo apt-get install sublime-text-installer
起動はsublで起動できます.
pythonの設定
pipのインストール
pipを入れるときはsudo apt-get install python-pipでeasy_installを使わずapt-getから入れました.numpyやscipyのインストール
apt-getからでもインストール出来るということなのでapt-getから行きます.
sudo apt-get install python-dev
sudo apt-get install python-numpy
sudo apt-get install python-scipy
